Showing posts with label solo. Show all posts

Thursday, February 13, 2025

Robinson Crusoe - solo castaway

 While I've been recovering, my brother-in-law has kindly lent me his copy of Robinson Crusoe - Adventures on the Cursed Island.

This is a solo / co-op game of being cast away on an uncharted island.

I played the first scenario "Castaway" and randomly picked the ship's cook as my character.


The core of this game is a limited time (12 days) to build a huge signal fire and attract a ship to rescue me.  Each day my character can take two actions (placing my two action tokens, rather like Agricola).

In a solo game I have help from Friday (1 action token) and a dog (1 action, but only to Explore the island or Hunt).


To complete the scenario I will have to Explore and find a mountain (a pre-req to make fire) and Gather 17 units of wood, then Build my shelter and the woodpile.  There's a lot to do and probably not enough time.

For each action I can use one of my tokens and then roll the dice to find out whether I succeed or fail, maybe taking a wound in the process, or I can use two tokens to succeed automatically.  This mechanic neatly emphasizes the feeling of too much to do with not enough time to do it properly.  No doubt there will be a need to take some risks and rush a few of the tasks.


Learning this game from the rulebook has been a major challenge.

There is a numbered list of 17 steps to setup a game and a picture of an example game with each element of the setup numbered to show which step put it there.  It should have been so easy.  Sadly there were several mistakes and unclear instructions, so it took me a week to reach the point of starting play.  The setup instructions are for a 4-player game, with a later section to explain the differences in a 2-player game.  A further section describes the solo game as just like the 2-player game with some differences.  Back and forth through the rulebook, I got there eventually.


This game has not skimped on the physical parts and the production value is impressive.  There is a space on the board for the action to Arrange the Camp, printed with a reminder of the results, and there is even a card to cover it up with the different results in a 4-player game, but not one for a solo game.

The cost in resources (wood & furs) to build a shelter varies with the number of players, but the table printed on the board starts with 2 players and only the rulebook notes in the solo section that solo costs are the same as for 2 players.


Once the cook has a fire, I can add a fireplace and then the evening meal will heal a wound.  I'm going to prioritise fire over building a shelter and accept some wounds overnight from sleeping rough on the beach.


I explored the next hex from my camp, taking the dog and got lucky.

what my exploration found


It's a mountain (presumably containing flints, since that lets me make fires and knives).  It also contains a natural shelter (saving me 2 wood and an action spent building).

I spent the rest of the day gathering wood and food in the new mountain with help from Friday.

So far I've found 2 hexes that produce wood, and I can only get 1 unit of wood per day from each of them.  15 wood in 12 days is looking impossible unless I can explore some more, and I still need spare actions to make fire and build the woodpile...  I'm starting to see what this game is about.

Tomorrow's priorities will have to be making fire and a fireplace, then move camp to the natural shelter tomorrow night...

Update: the game slowed down as the weather took a turn for the worse, requiring me to spend time on building a roof for the shelter and causing wounds in the meantime, which then had to be healed.  My exploration found 1 more hex, which yielded an antique rapier, the only weapon I needed

A series of event cards needed actions to be spent to deal with problems.  However, by day 7 I had the hatchet, which meant 2 units of wood per day without needing to spend any actions collecting it (on top of my existing stocpile from days of gathering)and I realised that the woodpile does not have to be built (with a build action for each stage) and instead builds itself so that victory became assured.


I had constant need to refer to the 61 pages of official errata and FAQ, which made this first game slow and frustrating, but there are plenty of other scenarios and different characters to use, so there should be new interest in each new playing.  Maybe I was unfairly lucky to win this one first time.

Until next time, health & happiness to you all.


Friday, October 25, 2024

Hopton Heath solo

I'm continuing to work through Mike Lambo's solo game book Battles of the English Civil War, following my glorious victory at Braddock Down [link].  The next scenario is Hopton Heath, and the book sets the Parliament player (me) the objective of killing the Earl of Northampton.  This is rather removed from the historical battle [see https://en.wikipedia.org/wiki/Battle_of_Hopton_Heath] where the Earl died leading a cavalry charge.  However, the Earl's death was just about Parliament's only positive point from the outcome of the battle.

setup and order dice for turn 1

As  you can see, I deployed my force along the ridge (of cork mats) while the Earl of Northampton (hiding behind the trees, top right) set up his "roaring megs" centrally, with horse on both flanks and a scattered foot force strewn all about the field.  That's what happens when you let the dice decide.  My plan is to let my cavalry deal with one wing of his horse first, then shift across to the other wing.  Meanwhile I don't roll enough movement orders (1s to 3s) to advance my infantry.

The Earl manoeuvred his force, with his right wing charging into Brereton's cavalry, but to no effect.

On turn 2 Brereton's cavalry threw back the royalist horse (which left the field on the royalist turn), while Gell's foot troops advanced to the front of the ridge.

The Earl's canon opened fire, but without effect.  However the pikemen hiding in the woods charged into my horse, with supporting fire from a unit of shot, and drove them from the field.  So our losses are even, but my force is still outnumbered, with the uphill task to reach the royalist headquarters and defeat it.


Turn 3, I moved around a bit, not closing with the enemy.  In response, the Earl's remaining cavalry charged up the ridge into my pike - never a good plan, but the only target they could reach.


Turn 4 my troops all converged on the royalist horsemen and utterly routed them.

In the Earl's turn, the canon blew away one of my pike units, while massed musketry routed the other.

Not looking good

At this point my only hope is to send the remaining cavalry wide to the right and then charge the Earl unsupported.  If the royalists are slow to react, I should get two attacks before the light fails, with a slim chance of winning (albeit a pyrrhic victory).


I'm going to raise two comments about the rules now, rather than wait to the end.  Firstly the ability of canon to fire through friendly units, even when they are engaged in hand-to-hand combat with the canon's target.  Those must be very skilled artillerists to judge the elevation so precisely.  And secondly I've noticed that my bold cavalry end-run could get stuck into the Earl's HQ a turn sooner if I send it straight through those trees directly in front of the Earl's position.  I can't find any penalty to the cavalry for charging through a wood.

These are both observations to the effect that the simple rules provided by Mike Lambo are just a little too simple for my taste.  I'm going to send the cavalry around the trees anyway, partly from a sense of what feels right, but also to keep them further from the royalist foot troops, to make sure they are not halted by some roaming block of pikemen.


The cavalry gallop wide and my two units of shot face 3 pikes, 2 shot and 2 canon.  Thanks to the way the royalist forces have formed up in a long column to attack, even a modest push-back sent the leading pike block off the field (because there was no space for it to halt its retreat).

"Roaring megs" blew away one of my two units of shot and now I'm worried that I may not have enough units left, because fewer units mean fewer order dice get rolled each turn and I want to be sure of having a move order for the cavalry.


My remaining shot move around to avoid combat as much as possible, but it does no good and they are taken out by lucky royalist shooting at maximum range.  The royalist pikes start to move toward my cavalry.

On turn 8 my cavalry fail to roll a move order.  The odds against me have just lengthened significantly.

Two moves left to reach the Earl

On turn 9 the cavalry resume their charge; the royalist shot are ineffective, the royalist pike just stand and watch.  One move left to close with the Earl.

I rolled an attack order.  Cavalry can only attack an adjacent target.  The battle is over, the sun sets and the Earl of Northampton holds the field.


Epilogue


The following day I played the scenario again, since the table was still laid out and ready.  The royalist play seemed more aggressive, with both cavalry units together on the Earl's left wing.  The big guns remained a constant threat and for several turns the dice were not my friends.  But eventually the tide of casualties went my way, with three of my units lost to six of the royalist units.  I still had both cavalry left, so I started the same end-run charge tactic and this time the Earl's headquarters was routed on turn 9.

My triumphant cavalry close with the Earl.  One unit already in contact while the other is about to charge through the woods to reach him.


Until next time, health & happiness to you all.

Thursday, September 26, 2024

Braddock Down solo

Some while ago, I played the battle of Edgehill from Mike Lambo's solo Battles of the English Civil War [link].  Although I wasn't successful at the first attempt, I did manage to win the battle on my third play.  Eventually I worked out how to take advantage of the plusses that are earned for supporting/flanking units in an attack.

I still don't have any hex-grid boards or cloths to use, so this is another scruffy-looking grid made from pennies to mark the centres of the hexes.  Wooded hexes are marked with a tree instead of a penny, and coasters represent the hills. The little red dice mark demoralised units and little yellow dice are orders.  This game might actually look appealing if I put it on a big table with three or four bases in each unit.

The photography is even worse than usual, because our bizarre English weather has today flipped over to continuous rain and barely any daylight, after last week was an Indian summer with plenty of sun-block needed.  At least, that's how it was on the South coast, I hear it was the other way round Up North.

the setup

I set up Hopton's forces with the cannon on the hill and then alternating pike with shot across the line.  The random setup for Parliament put the cavalry on the flanks and a jumble of foot troops in the centre.  It all looks very plausible.  Once again, my forces are outnumbered and I need to totally eliminate the opposition within a limited time.  It sounds like a tough challenge.

The rules reflect the player's command & control issues by rolling a bunch of dice (one per unit the player has on the table) and then allocating them to units to indicate what the units will do this turn. I want to move my pike units forward, fire my cannon, and maybe advance my muskets as well.  In this scenario, dice showing 1-3 allow moves, 4-6 allow firing.  I rolled 1-1-1-3-5-6-6 which is almost perfect.  All the pikes can move with 1s and the cannon can fire with the 5.  I chose to use my leadership ability and re-roll the 6s (I can re-roll any number of dice that are showing the same number).  They came up 2&3 so all the muskets can move as well.  Sadly my cannon fire had no effect on the parliamentarian horse.

On the AI's turn, his cavalry rushed forward 2 spaces toward my lines, while his foot troops barely moved.  Turn 2 will see the battle joined.  My pikes can counter-charge into 2 of his cavalry units, then the rest of the horse will charge home.

look at those order dice!

I don't know whether you can see the order dice on this picture, but it must be my birthday.  All the pike can move, all the shot can fire, and the cannon gets to move sideways behind one unit of pike to support its attack.  On my left, the cavalry recoiled one space.  On my right, the cavalry unit fled the field completely.  My muskets provided valuable support, but didn't get to fire on their own account.

On parliament's turn, the recoiling horse continue to retire, while the remaining cavalry reluctantly charge home into my pikes (to no effect).


On turn 3, my pikes repeat their performance, sending the parliamentarian horse on my left routing back to their baseline, while completely eliminating the horse on my right.  The muskets step up into supporting positions behind them.  On parliament's turn, all their routed horse leave the field, while a lone unit of pike has advanced in the centre and closes with my centre pikemen, scoring an exact hit.


On turn 4 my centre pikes rally, while their neighbours charge the enemy unit, with all 3 units of muskets in range.  Cross off one unit of pikes from the parliamentarian force.


Turn 5 was quiet.  My pikemen formed an oblique line to the front, while my muskets took pot-shots at the leading enemy units.  One scored a hit on parliament's remaing pike unit, pushing it back one space.  Unfortunately for the pikes, two units of muskets had lined up behind them, so they had no space to retire and fled the field.  You couldn't make it up!  Then a lucky musket shot did the same thing to the pikemen at the left of my line, sending them past their supporting muskets and cannon, straight off the field.  Fair enough.


On turn 6 one of pike blocks charged one of his muskets, with support from 2 of my muskets, sending him running off the field.  In response, parliament's shooting sends two of my units back a space.

running out of time

Turn 7 presents a quandary.  With my whole force out of range apart from one block of pikes, the obvious move is to pull the pikes back into the trees while the rest rally & reorganise.  But that will only leave 3 turns to cross 3 spaces of ground and trust that I can clear the remainder of parliament's force in a single attack on the final turn.  So I chose to press ahead piecemeal and hope to withstand the concentrated musketry on the way.


I got away with it.  My leading pair of musket & pike between them managed to disorder both of parliament's musket units.  The rest of my force is running to catch up, but getting left behind.  In response, both of parliament's units failed to rally and fled the field.  Victory is mine.

I'd like to claim credit for masterful tactical play, but I think outrageously lucky die-rolling had more of an impact.


I've already commented [here] on the strange feeling of seeing separate pike and shot units at this scale.  However, I do like the combat mechanics.  If you score the target number to hit an opponent, the opponent is disordered and retreats 2 spaces each turn until it rallies.  In addition, any amount by which you roll higher than the target number causes an immediate 1-space retreat.  So a target of 8+ on 2d6 and a roll of 11 means a 3-space retreat immediately, probably followed by 2 more spaces (and leaving the field) if the unit doesn't rally immediately on the next AI turn.  There's no need to track losses or multiple levels of morale failure, and the visible effect of combat is that some formations stop advancing, some back up a bit and some run for home.  I think a similar system would work well for brigade-sized units in a Napoleonic or ACW game.


One pikeman lost his weapon in the making of this report and he will report to the repair shop tomorrow.

Until next time, health & happiness to you all.


Tuesday, September 24, 2024

Five Parsecs campaign Byakhee - turn 3

This is a continuation of my first campaign with Five Parsecs from Home [previous episode], using second edition rules, started in 2019.

Log of the strange alien vessel Byakhee, captain Anton recording.

Since we reached Garrideb-2, we've done a couple of jobs for my old acquaintance Hakon Hardpoint, but something went wrong and now he won't take my calls.  We gained a re-conditioned droid to swell our numbers and fitted it with a hunting rifle. Craig has taken up poetry and developed a crush on Dolly.  I really hope it won't affect his effectiveness in a firefight.

Between us we have Cr 20, just like we had when we started, and no useful contacts to put work our way.  I see tough times ahead.

Campaign turn 3 - on Garrideb-2

Upkeep costs Cr 4.  The two crew in sick bay recover after upkeep is paid, and they didn't need any fresh veg delivered last week.

Assignments: Anton goes to find work, taking Boris; Craig & Erica trade, Dolly & Franz are checked out from sick bay but aren't fit to take an assignment this turn, K2 explores the town

Anton meets Lana Lane, a traveller just visiting Garrideb-2.  She's trying to find someone called Mike Manton and would appreciate our help.  Her only clue is a self-store unit that Manton was renting.  I guess we'll speak nicely to the supervisor there.

Craig's trading efforts picked up some medical supplies to shorten a visit to sick bay.  Erica came back to the ship with a worthless novelty stuffed animal.

K2 meets an alien merchant, but doesn't have any alien gear to trade with him.


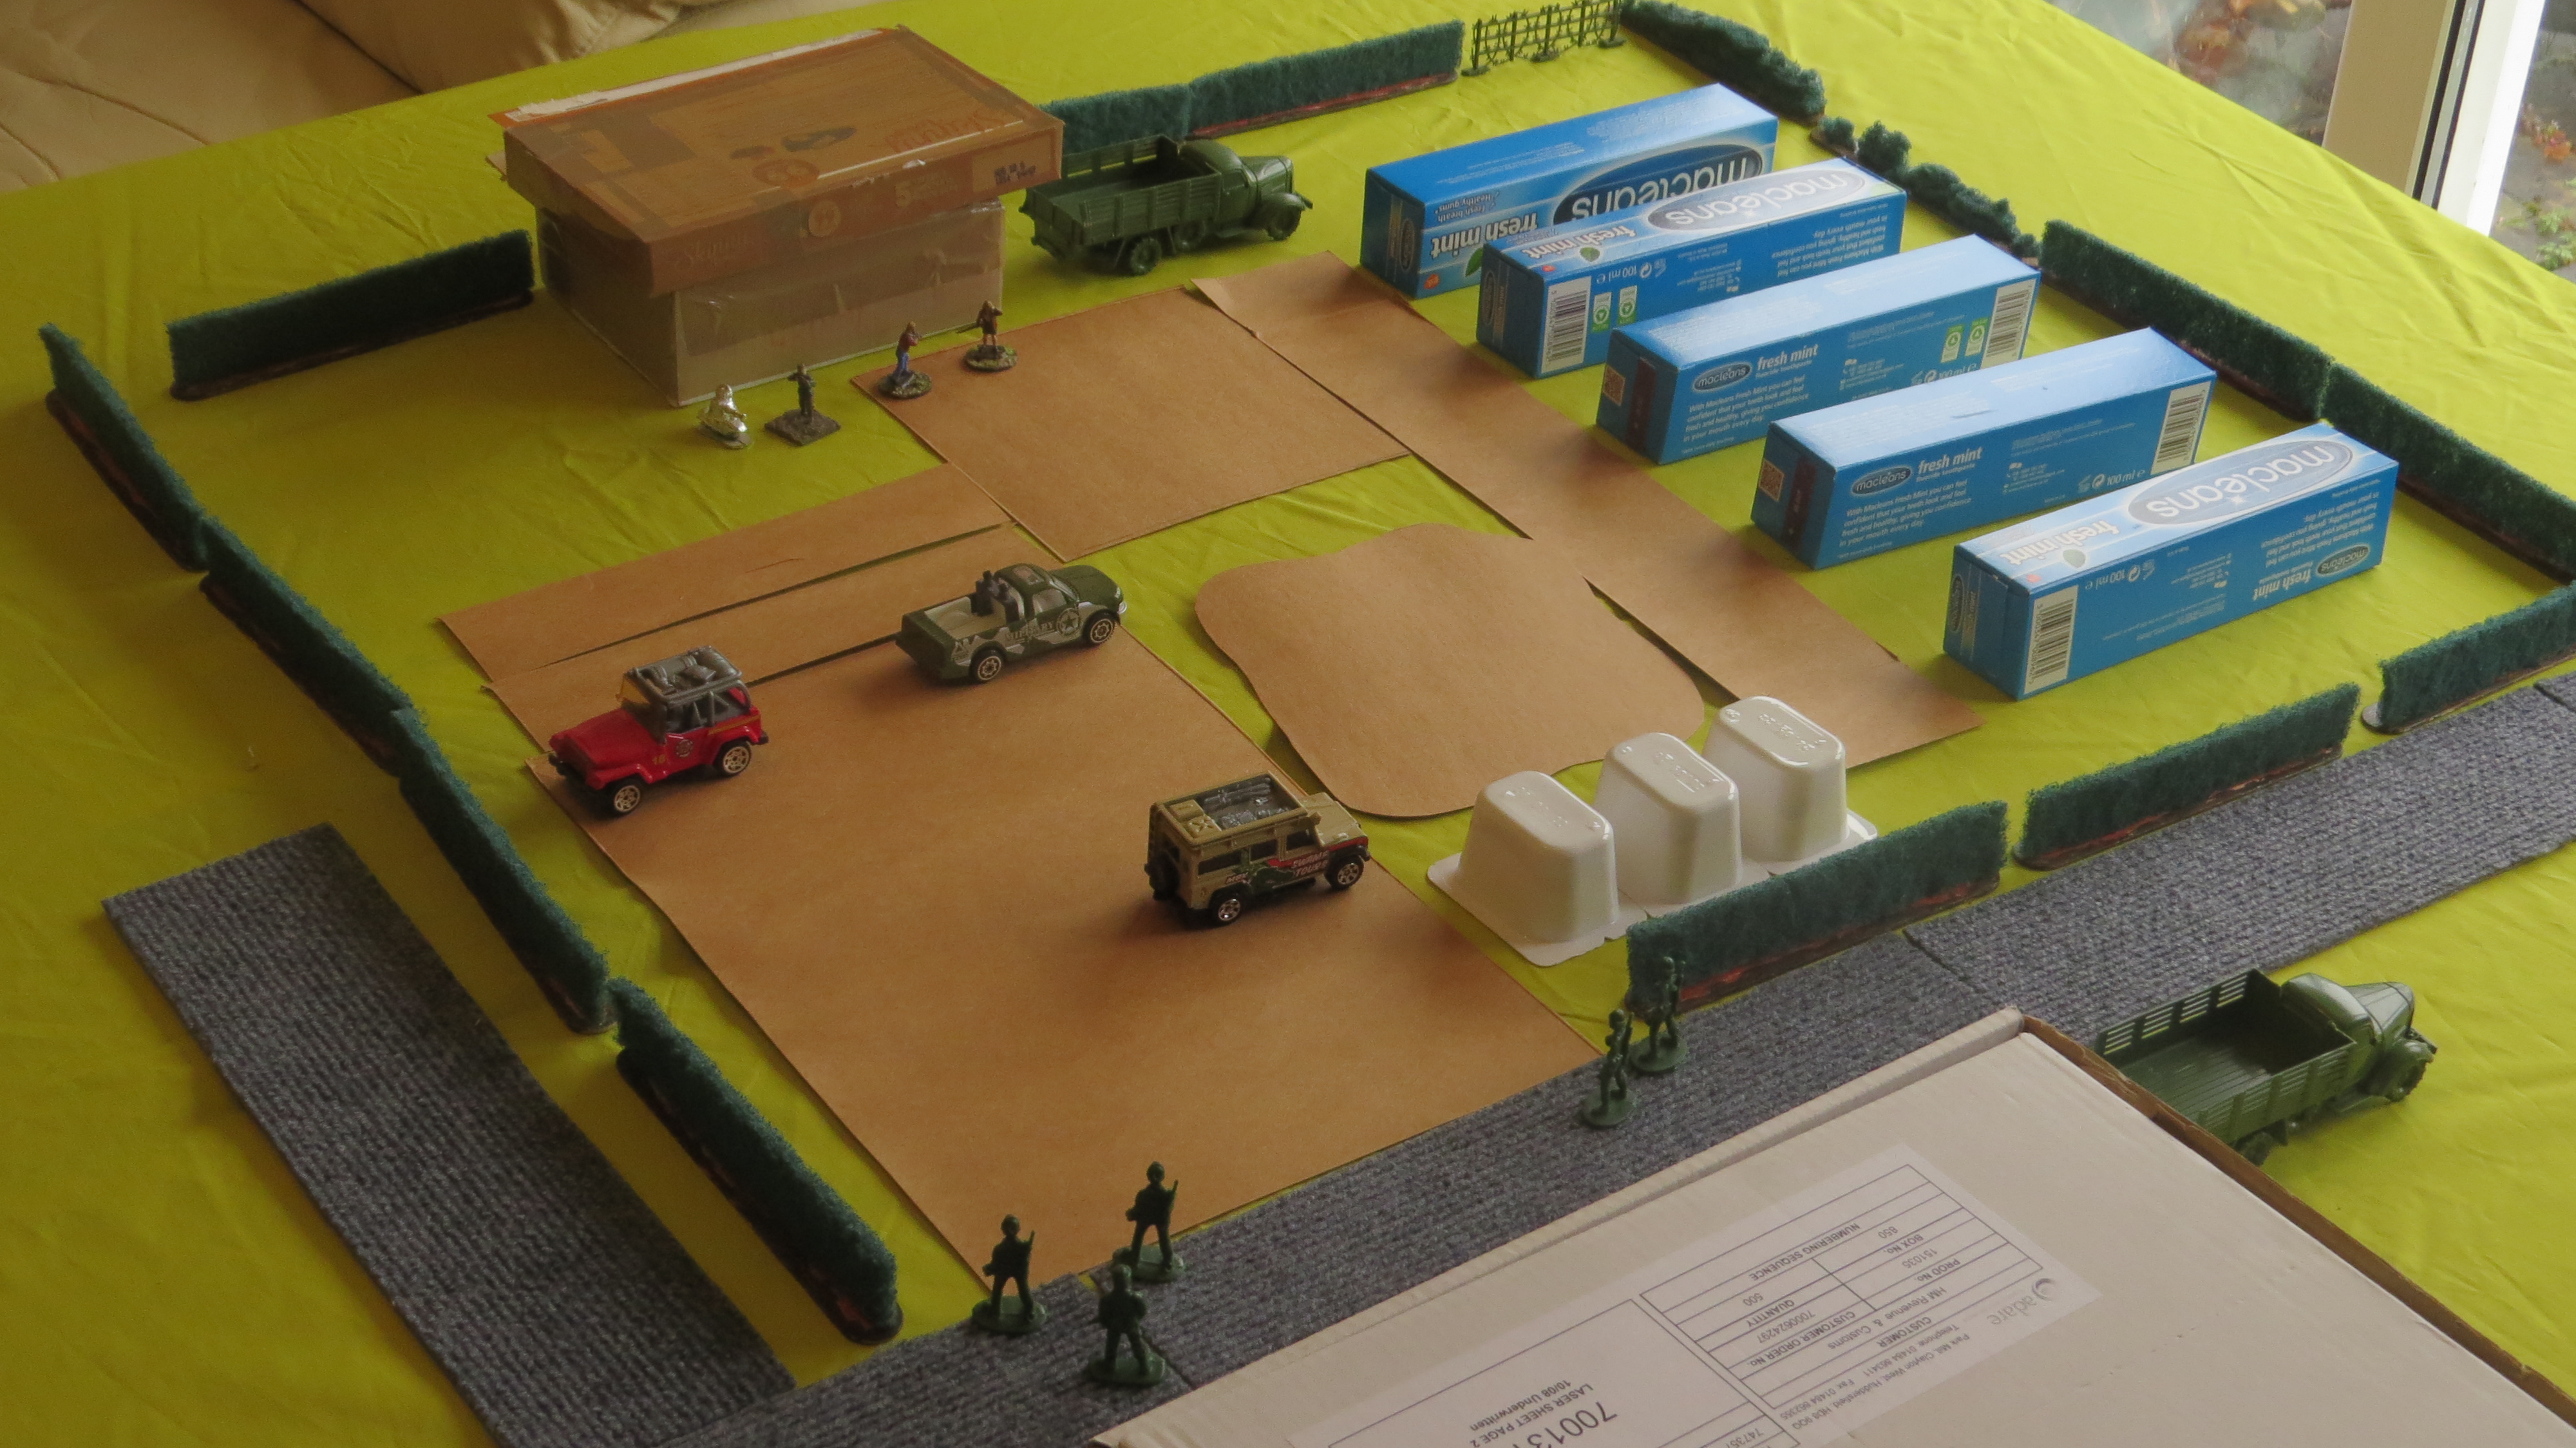
The backwater self-store was just a yard full of shipping containers with an office cabin and a parking area.  The whole lot is surrounded by a security fence.  This one has an ornamental pond in front of the fuel-storage tanks, but something in the environment has turned it the same rusty brown as the parking area and the footpaths.  Best not to go swimming.  Even wading is probably a bad idea.

It turns out that Garrideb-2 is home to the Macleans corporation and 90% of the surplus shipping containers carry their logo.  The minerals mined here make the cheapest toothpaste in the sector.

Anton went inside the office to talk to the supervisor about how much it would cost us to take a look in Manton's storage unit, while the rest of the crew (K2N4, Boris, Craig & Dolly) waited outside.  That's when trouble showed up, back at the main gate.

The storage depot, just as trouble arrives

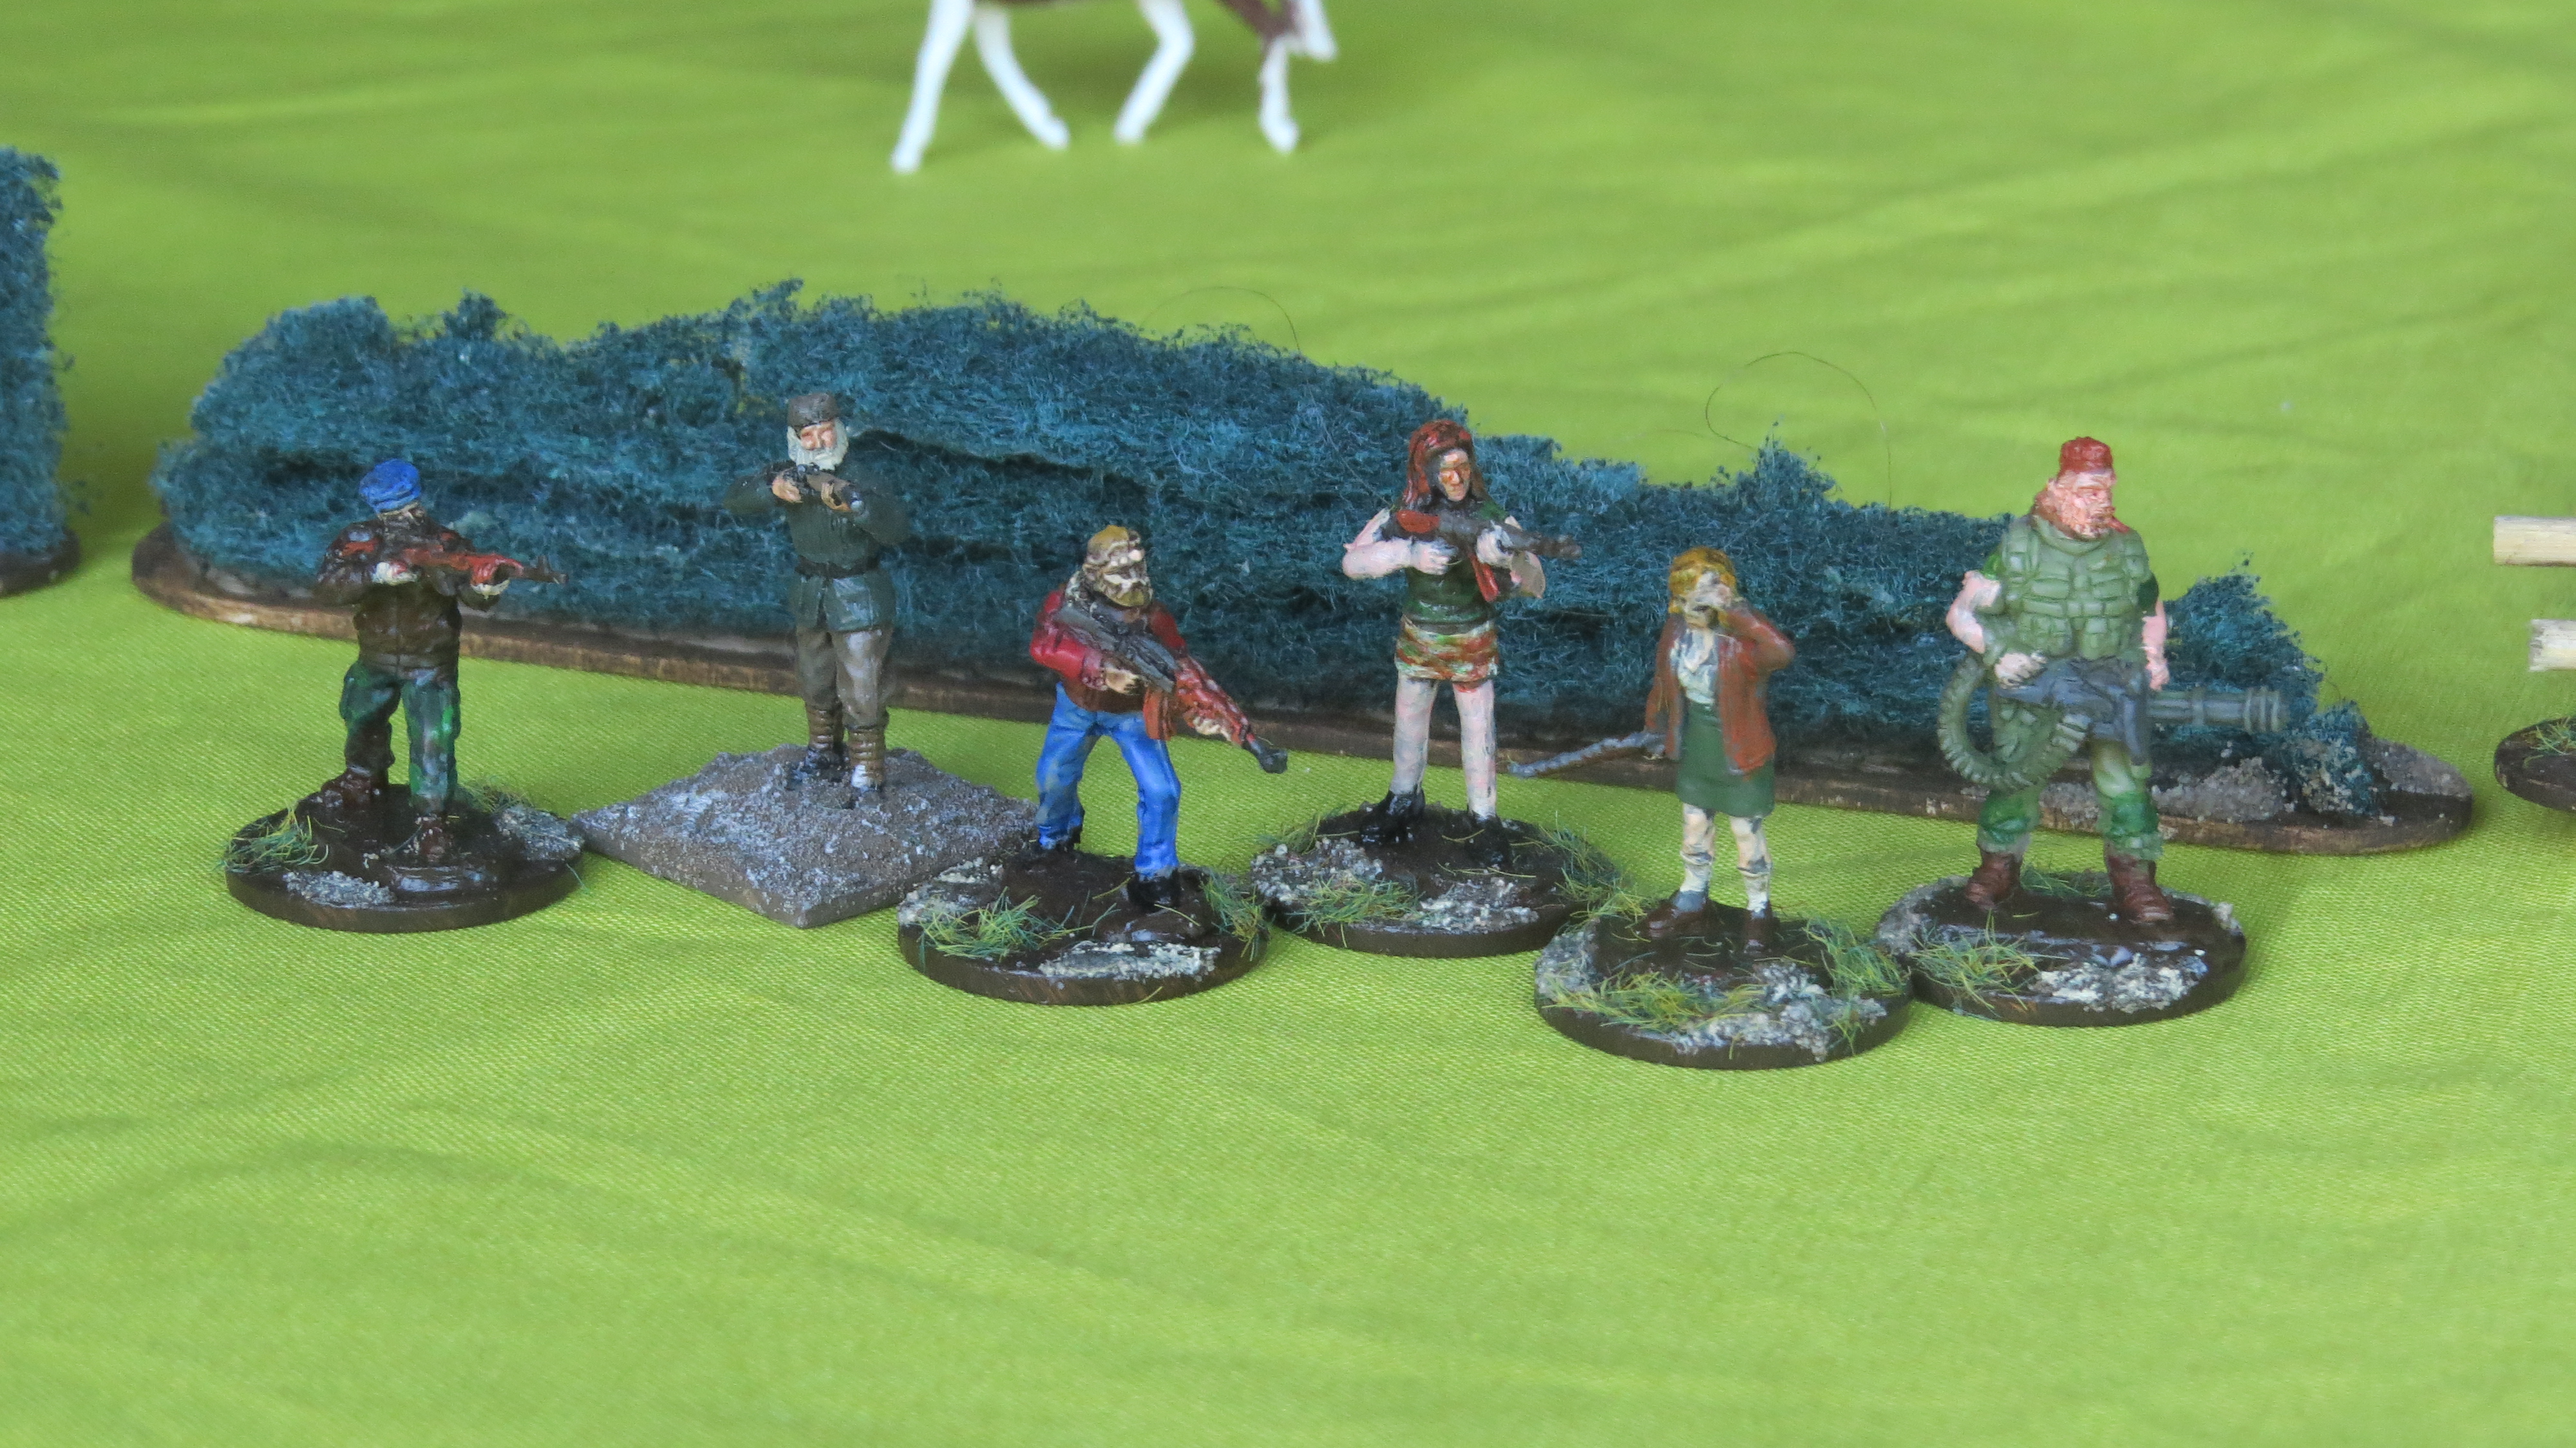
Genetic renegades: geneered troopers, half as tall again as a normal man, with skin as green as their olive drab uniform, the renegades have deserted from the army and formed their own communities.  They loot and steal whatever they need to keep going.  Maybe there is something in the storage facility to draw them here and the crew are just in the way?

[as it happens, toothpaste comes in a box just the right size for a 40' container in 1/72 scale.  I just need to paint them.  The cheap army men are a different story, let's not talk about them, they cost a penny each, and they'll do for today.]


Five renegades armed with rifles split into two groups for a tactical advance.  One group can lay down suppressing fire while the other group moves.  The larger group probably includes a leader.

Boris has a clear shot at a renegade, but misses.  K2 does the same (and also misses).

The renegades run for cover behind the storage tanks and the vehicles in the parking area.

Erica sets off to circle around the pond and close with these guys. Craig follows her, looking for a clear shot on a renegade, but misses.

Anton steps out of the office to see what's going on.


Anton uses his jump belt to get onto the roof of the office, and takes a shot at a renegade, but misses.  Craig takes a second shot but misses again

The renegades manoeuvre around the tanks & containers.  One renegade shoots back at Craig.

Erica moves into cover between two containers. Boris & K2 move wide, to cover the parking area.


Craig prepares to snap fire as soon as a target moves into sight.

The renegades shift across toward the back of the containers.

Craig takes his shot as one of them dashes between cover. Misses again. Boris moves through the car park for a shot - misses.

Anton is cursing something about all this love poetry affecting Craig's ability to shoot straight..


Craig & Anton prepare snap fire. Boris takes another shot, hits a renegade but only stuns him.  The renegade returns fire, hits Boris and stuns him in return.

Another renegade crosses the gap to join the two in position behind the shipping containers. Craig snap fires at him and puts 1 stun marker on him. Anton snap fires too and adds a 2nd stun marker. K2 moves up into a firing position near Boris and takes out the stunned renegade.

Erica steps out at the back of the containers & takes down another renegade.

The renegades take 1 morale failure (their morale is 2)

Erica gets a clear shot on a renegade

K2 & Boris both fire at a renegade & both miss. The renegade returns fire at Boris but also misses.

Two renegades are pinned down behind the fuel tanks.  They can't move into a firing position without closing inside 12" and their rifles are no good as brawling weapons. Anton & Craig have no targets in sight & no clear action to take.  This is settling into a stand-off.

Meanwhile Erica continues to advance around the back of the containers


K2 hits another renegade & takes him down

Anton prepares snap fire in case the two renegades that are pinned down behind the fuel tanks decide to make a dash for it.

Erica moves up between the containers

Craig and Boris also advance

The renegades take another morale failure & run for it

K2N4 picks off another renegade

Post-battle

The renegades came looking for easy pickings and soon realised that they had chosen the wrong day to visit.

The self-store manager was so pleased we drove them away that he let us in to Manton's storage unit, where we found the rental papers for a farmhouse out in the wilds.  Job done here.  Lana Lane can go look for him on the farm.

The genetic renegades bear no grudge for losing 3 of their number. They just picked the wrong day to come scavenging.

Lana pays Cr4 for tracing Manton.


Loot: we search the bodies & get 3 items off the Trade table: an instruction manual (+1 XP), a repair kit and a load of fuel for the ship (which reduces the cost of the next journey by Cr2).  I didn't see the renegades carrying a huge fuel tank around, so maybe it was on their truck (clearly visible on the road outside the self-store depot).

Nobody got seriously hurt today, so sick bay will be empty for a change.

xps: Anton 3, Boris 3, Craig 3, Dolly 0, Erica 4, Franz 0

Although K2 scored the first casualty, Erica was the first who could claim experience points for it.  K2 is just a machine.

Anton decides to let Dolly read the instruction manual, even though she wasn't in the fight, to get her Combat skill up to 1.

Shopping: not this turn, the job paid just enough to cover upkeep. Again.


Campaign event: one of your crew seems to have had an adventure. Anton spends some time thinking about his recent adventures & earns +2 XP

Character event: Craig has a make over to look his best for Dolly.  Ditch the bomber jacket and pick out a new look.


As mentioned last time [link], this is probably a good moment to say goodbye to the crew of the Byakhee and start a new campaign with the 3rd edition rules.

Until next time, health & happiness to you all.

Saturday, September 21, 2024

Five Parsecs campaign Byakhee

This is an introduction to my first campaign with Five Parsecs from Home, using second edition rules, started in 2019.

It was a long time ago, and a lot has changed since then.

You may ask why I bother to bring it out now, after all this time.  I'm not just planning to show how the story elements evolve in this particular campaign, but to discuss some of the changes in third edition and compare Five Parsecs with some of Ivan Sorensen's other games.

Setup

Log of the strange alien vessel Byakhee, captain Anton recording.

My crew is an accretion of starport scum, who recognised this ship as their best chance to get away from the gang boss Jax Smitheren.  As soon as we could afford the fuel and other costs, we made the hyper-leap to Garrideb-2.  Now we have to make enough credits to keep ourselves going.  There are six of us, which is a comfortable size crew to take care of local difficulties.

Franz was a bounty hunter who picked up a Wanted poster for one of Jax's gang.  He doesn't talk about the details, but Jax found out and Franz needed to put some distance between them.  Same story as my own, except that I was an agent working undercover.  Franz carries a rattle gun (kind of a squad machine gun) with a hand gun as backup and dazzle grenades (flash-bangs) in case he's outnumbered.

Erika was working on a research outpost, though it didn't pay enough for the life she wants.  She carries a shotgun and a maul for close-quarter work.  It's ironic that she had a decent salary but wanted more, while Dolly was working for peanuts on a frontier gang and only wants to get her hands on some high-tech kit like Erika was getting paid to use for research work.  Dolly has a similar weapon setup to Erika, with a blast rifle and a brutal melee weapon, plus a jump belt to get into the action.

Boris is an artist.  Seriously, you should see his paintings.  I think he only travels with us because he needs to see the sights and the action that he can paint later.  He's handy enough with a rifle, but nothing special.

Craig on the other hand is a proper soldier, with an auto-rifle and he reacts sharply when the shooting starts.  Could be because he grew up in a permanent war zone, so it's what he's used to.  Now he just craves more adventure.

Between us we have Cr 27

The crew - Anton, Boris, Craig, Dolly, Erika & Franz

Rules notes

Ivan loves to play with different systems for each aspect of the game.  Some of his games even include multiple options for a single rule in the same book.  Melee combat is a good example.  

In 5 Parsecs, each character rolls one d6, adjusts for combat skill and weapon type, then the winner scores a hit on the other.  Rolls of 1 or 6 cause additional hits.   For each hit, roll d6 + damage stat of the weapon vs toughness of the target to pushback or kill.

In 5 Leagues, a turn of melee contains 3 "exchanges" where each character  rolls one d6 and adjusts for combat skill, but one of them is the attacker and only the attacker can score a hit by beating the defender's total.  The defender can only seize the advantage and become the attacker.  For each hit, roll d6 with adjustments for the weapon vs the armour value fo the defender to cause harm; then roll again vs toughness of the target to stun, wound or kill.

Obviously 5 Leagues has a greater focus on melee, with an expectation of longer and more interesting sword fights, and also more focus on armour (in 5 Parsecs, armour simply increases toughness).


Campaign turn 1 - on Garrideb-2

Upkeep reduces the ship's treasury to Cr 21.

Anton hands out the assignments: he will get a job from the patron, Dolly will train, Boris & Erica trade, Craig & Franz explore

Anton's patron is a local pirate, Hakon Hardpoint, who wants the group to defend some guy called Istvan against zealots from the church of Jammu while he travels to a secret location across town.  Anton figures that should make some money for the crew.

Boris & Erica manage to buy a useless trinket and a repair kit (which can be used to prevent 1 item being destroyed).

Craig meets someone and has a nice chat. Franz eats some bad food and gets to spend the next turn in sick-bay.

Most of the party is fit to join Istvan and escort him to his hideout.

As the party sets off across town, they bump into ten zealots armed with rifles, apart from one with a cling-fire pistol (or hand flamer if you prefer, but that name's copyright is owned by another company), who is the leader.  They setup in a blob with 1" spacing.

Zealots have the "psycho" AI, so they will move as fast as possible towards the closest opponent and will always attempt to enter Brawling combat.


I took no pictures of this fight.  You can imagine a few streets of housing, using old cardboard boxes as buildings.  Your imagined scene probably looks better than any photographs would have done.


Anton uses his jump ability to get onto a house roof & establish a sniper post.  Dolly gets half-way to one.  The zealots approach.

Anton fires but misses.  Dolly take up position. Zealots advance (they can't be bothered to stop and shoot Dolly).

Anton & Dolly both miss with their next shots. Franz dashes up.  Zealots advance.

Anton scores a hit (but no kill). Dolly misses. Zealots advance.

Dolly blows one to pieces (6+1 damage). Zealts advance, their morale remains solid.

A zealot climbs onto the roof and brawls with Dolly. Dolly goes down. Anton takes out one zealot (remembering the "aim" rule). Both sides have good morale.

Zealots advance.

Anton scores a headshot on a zealot (6+1 damage). Zealots advance, their morale solid.

Anton stuns 1 zealot. Zealots advance and almost close with Anton.

Anton bugs out, using his jump to get clear. Craig & Erica both miss their targets. Zealots advance.

5 actions! Franz stuns one, Erica stuns one, Boris blows the leader's head off, Craig misses, Anton kills one. Zealots advance. Zealots lose 2 morale.

Anton bugs out again. Erica kills one. Zealots advance. One brawls Erica and is stunned. One brawls Craig and is stunned. One brawls Erica and stuns her.

Zealot morale breaks and they run. 


This was a surprisingly tense fight, always backing away from the advancing tide of enemies.  Breaking the morale of this particular opposition was particularly difficult. On average these zealots will only stop after 9 out of 10 of them are dead!

The zealot AI was baffling.  Armed with rifles they rush into a brawl and just use them as clubs - not a great strategy.  This has been fixed in the 3rd edition, where they use the Aggressive AI model, instead of Psycho.  Now they will stop and shoot when they see a target.

As my first play of Five Parsecs, there were some mistakes in play.  Most of the party were limited to standing still (not even acting late) while all the badguys moved every turn.  That's because the QRS didn't mention that any characters who don't get assigned a fast action will act in the Slow Action phase, and I forgot.

One rules quibble: how is a hunting rifle only accurate to the same 6" distance as a handgun? In effect, every weapon has a to-hit target for long range and an easier target for short range, but short range is the same for every weapon.  So a pistol always gets the easy to-hit target, while a rifle isn't accurate beyond pistol range.  This strange behaviour is still there in 3rd edition.

After the fight

The Jammu guys don't come after the crew as enemies, just because we helped Istvan make it across town, and Hakon pays 5 creds plus loot: an old droid "K2N4". It costs 3 Credits to repair him. Add a droid to the crew. He's straight out of the chapter on "odd-ball characters".

Dolly recovers after 1 turn in sick bay (#52) alongside Franz (with his stomach ache)

xps: Anton 3, Boris 4, Craig 3, Dolly 2, Erica 3, Franz 3

Shopping: a roll on the gear table comes up with a set of combat armour (+1 Tough & +1 React), which is a worthwhile investment in the survival of the crew

Campaign event: a tax audit costs 5 credits.  It seems Anton has been lax in 

Character event: Craig takes up an unusual hobby, poetry.  What is this, an artists' commune?  A painter and a poet on board, but not a medic.


Campaign turn 2 - on Garrideb-2

Upkeep costs Cr 4 (with 2 crew in sick bay), reducing ship's funds to Cr 16.  This is another difference between games, with upkeep in Five Leagues being free for small groups and only the excess members of the party needing to pay for their keep.

Anton hands out the crew assignments: he will find work, taking Boris with him, Craig & Erica will trade, Dolly & Franz are in sick bay

Hakon has another job for the crew, to patrol a farm and mind the animals.

Craig picked up some trade goods worth 1d6 credits at the next planet.  You know, the stuff they produce here on Garrideb-2 that could be in demand somewhere else.  Erica gets a "Fixer" (to repair something broken).

The crew shuffle some gear around and head over to the farm.

The farm.  Not all the animals appear tame

On patrol, they are attacked by 3 assassins with Blast pistols & a blast rifle for the leader

Once again it's an odd choice of weapon and behaviour pattern for the assassins.  Why do they rush in to close quarters?  At least they do all have pistols, so they face no penalty in brawling.

Also, I was confused about the mission.  It's a patrol, with a location of "farm animals", so are the assassins out to kill the animals, or us, or steal the animals, or are the livestock just in the way (like patrolling a building)?

I chose to assume the animals are just wandering scenery.

  • 0-2" move each turn (d6/2-1) in a random direction.  They block line of sight and act as a walking hedge.
  • Animals move at end of turn (after slow actions)
  • Attempts to pass through an animal are hazardous.

The assassins arrive at the far side of the farm, outside the hedge.

Anton is on watch on the roof of the prefab-hab.  K2N4 has just started a perimeter patrol clockwise.  For some reason he looks like a space marine in this game; later on he gets replaced by a shiny metallic droid.  The others are resting inside the hab.


Anton spots movement outside the perimeter and the fight is on.  Erica & Craig deploy from the hab.

The assassins cross the hedge into the field of giant animals

K2 patrols around the pig field.  Boris deploys from the hab

Anton takes aim & shoots at the nearest assassin, rolls a 6 & hits for 3+1, taking him down!  Lucky start.

The livestock wanders about.  The Assassins make their morale roll & continue their attack

First blood to Anton

Anton waits for the other assassins to move out from behind the horse

Erica climbs over the hedge and moves up

With no clear shot past the horse, the assassins split up and go past the horse one on either side.  They don't have a target in range.

Anton reacts & shoots at the boss assassin, rolls 5 & hits for 4+1, taking him down too.  Anton is absolutely at his sharpest today.

Craig & K2 move up.

The remaining assassin fails the morale roll (a 2) - but it's irrelevant; this guy is never going to give up.

Anton takes aim & shoots at the last assassin, rolls a 6 & hits for 6+1.  Nice one!

Like shooting fish in a barrel

Post-battle

The Garrideb assassins bear no grudge for losing 3 of their number. Whoever took out the contract should have paid for a bigger team.

Hakon pays the crew Cr4 for keeping the farm safe.

Loot: we search the bodies & get 2 items off the Gear table: a 2nd fixer and some frakk grenades

xps: Anton 6, Boris 3, Craig 3, Dolly 0, Erica 3, Franz 0

Man of the match award goes to Anton for his flawless marksmanship. Bonus xp to Anton for defeating Tough enemies.

Shopping: not this turn.  The pay equals the cost of upkeep, so there's no spare cash to splash about.

Campaign event: Something's up, Hakon won't work with us any more.  If I were a fraction more paranoid, I'd wonder if he set us up with this job and hired the assassins to hit us...

Character event: Craig makes friends with Dolly. Both receive +1 XP

I guess he missed her while she was in sick bay and he was walking around some local farm.  Maybe he even wrote a poem for her.


Third Edition

This game was played with the older 2nd edition rules.  Since then Modiphius has published the 3rd edition.  There are a lot of tweaks to the rule details, and one of my gripes about these two scenarios is already addressed with new encounter tables.  On that basis alone, I'd like to recommend the new edition and switch over to it right away.  But...

There is a lot of new material in the new edition.  Specific alien races, special characters, ship upgrades, more details for space travel & creating new worlds, advanced training options for crew members, more background on the Unity setting, more options for adding a storyline to the campaign.  Mostly I welcome this, so long as it doesn't turn into the very specific setting and races that need specific models from one manufacturer.  An encounter with "renegade troops" can use any half-way military model, but if a future edition gets to cat-people in power armour with multi-barrelled pistols then I won't bother using those rules or collecting the official models.

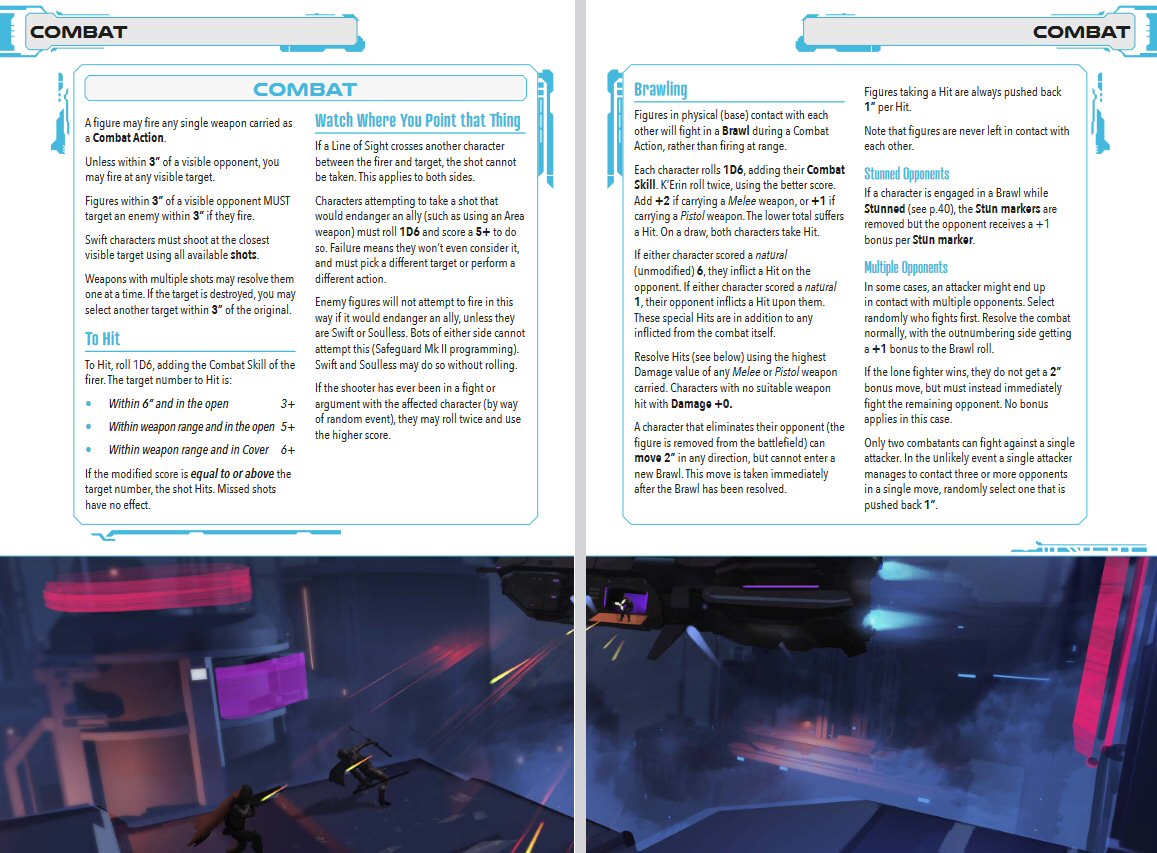
The rulebook has had the attentions of a team of professional designers and artists, where the 2nd edition looks like it was written in a word processor package with a few of the author's photographs of games wherever a half-page at the end of a chapter would be blank paper.  On the flipside, the 2nd edition had easily readable type and didn't waste space having artwork on every page.  Here are a couple of pages from each edition to show what I mean.

2nd edition


3rd edition

The second edition combat section takes 2 pages, the third edition takes 5 pages, although the fifth page contains one illustrated example of combat and half a page of pictures of futuristic weapons (with no labels, so just eye-candy).  Overall the rules have grown from 59 pages to 182.

As a result I'll be moving grudgingly to 3rd edition, but re-typing all the important stuff like combat rules to make my own quick-reference sheets in a readable size and colour.

Until next time, health & happiness to you all.


Thursday, August 22, 2024

Bad Spelling Mission 4 - The road to Paderborn

23/11/1983 Sov 3rd army forces BAOR fighting retreat into Ruhr cities. Bad Spelling is isolated behind the front line

The team has just returned with a sealed container from the supply dump where Major Lawrence expected it to be, which they suspect to be a battlefield-level nuclear device.  The major refers to it as the "beastie".  On return to base, the team meets two more stragglers to join them, one of whom immediately manages to injure himself and is sent straight to sickbay.

Also waiting to meet them is the mayor of Bad Spelling.  He has a request for the army, which is to find out whether the road is clear and safe for him to travel to Paderborn.  Major Lawrence decides to leave at once, taking advantage of darkness, pausing only to grab something to eat and to lock the "beastie" in a store cupboard.  His plan is to travel until we find an enemy checkpoint, then snatch one of the enemy on duty and bring him home for interrogation.

The Brits leave the Land Rover and proceed on foot

Stealth rules will apply, modified for OHSW.  The team will drive as far as they dare, but then leave the Land Rover and arrive on foot.

The enemy has a defensive position set up in the outskirts of Paderborn.  There is a PK MG (emplaced, on a tripod), with 2 additional crew (carrying AK-74s, but one acting as crewman/loader to the PK) and a sniper. The second squaddie (patrolling) and the sniper will be up to 12" from the MG position.

The soviet checkpoint

Stealth: until the attacking player is detected, only the patrol figures may move (1d6-2" in a random direction) and no shooting is permitted.

Any attacker within 6" and in LoS is detected automatically unless moving into contact and defeating the defender in HTH (assumed silently).

For attackers within 4" but not in LoS, or in LoS but >6" away, check for detection: defender draws 1 card, attacker 2.  If defender has the highest card, check the colour of defender's card: black=alert (move defender 2" closer and check again), red=detected (alarm is raised, no more stealth).

The edge of town

As mentioned last time, this is (I hope) the lowest point for scenery in this series, with cardboard boxes standing in for buildings.

Most of the table didn't get used, so you can ignore the medical centre at bottom left, the chapel and the park.  The action is concentrated around the checkpoint (top right corner of the square).

To the right of the checkpoint, the Brits are moving around a large, brown building (council offices), with Newton to the left.  Beyond them, a minibus of some kind is parked outside an office building at the back (the "back office" mentioned later).  At top centre, behind the MG position, another building faces the "back office", with the soviet transport parked between the two.

At this moment, the Soviet sniper is just behind the MG emplacement, while the patrolling soldier is at the left of the square, having walked across to check on the park.


The Brits begin to approach. The Russian patrol walks back to check on the sniper behind the truck (guarding the rear), then up to the MG position. The Brits take up positions behind the council office, waiting to see what the patrol will do next

The patrol walks around in the square.  Newton contemplates a dash straight across the MG's fire-lane to cover behind the white-roofed building.  The patrol's back is turned and the MG crew won't step forward on an alert.  He decides to go for it and ... turns up a joker.  A noise in the distance makes everyone turn, including Newton, who quickly ducks back into cover.  The turn ends.


The patrol turns and starts back toward the MG position.  The Brits hold their breath.  Passing the MG, the patrol checks on the truck.  Fraser gets in position to dash past the side of the MG

The patrol checks on the sniper.  Fraser backs off, so he won't be seen if the patrol turns back.

Fraser takes cover at the corner

The patrol turns!

Fraser slips back into position.  The patrol moves to check on the truck & Fraser takes his chance.  He rushes across the street and down the side of the back office.

The back office, Fraser and the patrol

The patrol walks around the corner behind the back office, up to 5" from Fraser, but immediately turns back to rejoin the sniper.  So close!

The patrol turns around and takes another look behind the back office.  Fraser rushes him! The patrol wins the fight - Fraser is down!

Although the Brits have 8 more action points, initiative switches immediately to the Russians.


Ten seconds of violence

The patrol and sniper move forward to engage the Brits - the MG team holds position.  The patrol shoots at the Major, but misses.

The Major throws a grenade.  The sniper is down, but the patrol is saved by the wall

Dangerous runs forward behind a car and starts firing on the patrol. The patrol fires back.

The Major steps out of cover and throws the other grenade into the MG position.  Both the crew go down.  Davies shoots the patrol and puts him down.

Newton moves toward the rest of the team.  Lawrence & Davies secure all 4 Russians. Game over.  The team secure all 4 men from the checkpoint and hurry away, stealing the truck as well as taking their own Land Rover (because you can't fit 4 prisoners in a Landie).

Scenario design: this was stealthy and stressful.  Fraser's bungled grab at the patrolling sentry felt like the objective was lost, but the use of both grenades saved the day.

After the fight

  • The Brits have achieved their objective.
  • Fraser is lightly wounded and will be out of action for 6 days
  • 4 prisoners taken.

Reinforcements: One figure with L1A1 SLR, one with pistol - Pvt Oliver & Capt Preson have found their way to the base at Bad Spelling.

Specialist gear: medical kit (Re-draw one card to recover from a knock-down)

Skill gain: Newton gains Charisma

Group morale: 5 - rolled 7 good and 1 bad dice, scoring 2 increase

Campaign events

  • Pvt Oliver reveals that he is actually on his way to take leave, and will be gone for 9 days.  Like Paddy O'Loughlin in sickbay, he has no sooner joined us than leaving us again. Maybe we'll see him on the 2nd of December, unless he joins some other unit.
  • No break - no time passes in the campaign before the next mission is assigned.  Hopefully there will be time for breakfast, but that may depend on what action comes next.

Player action: add another man to the group - Pvt Richards

The team is now strangely top-heavy, Major Lawrence & Captain Preston leading privates Davies, Newton & Richards.

Meanwhile Edwards, Fraser, Harris, Mitchell & O'Loughlin are recovering from injuries and Oliver is on leave.

People the team knows:

  • Lotte Meierling, a refugee from Hannover
  • Dieter Pletternberg, mayor of Bad Spelling

Until next time, health & happiness to you all.

Thursday, July 4, 2024

Bad Spelling chapter 3 - Grab the nuke

23/11/1983 Sov 3rd army forces BAOR fighting retreat into Ruhr cities. Bad Spelling is isolated behind the front line.

Maj Lawrence needs the team to pick up the item that he was being interrogated about. It's in a supply depot, he doesn't know which building precisely, or it may still be loaded on a lorry.  Not a stealth job, just get in and grab it.  (I couldn't have made it up.  The team rolled a follow-up mission at an intact building to Retrieve something).

The enemy has two sentries with Skorpion SMGs on duty (rather an odd choice by the dice), ready to call out a guard detail of an officer (pistol), a sniper (rifle), two guards with AK-74 and one with an AK-74 plus grenade launcher.

Motivation: 2 (chosen on the basis of campaign history) these are secondary units in an accidental meeting, not here for a fight

OHSW rules

For OHSW I re-wrote the sentry rules from 5MIN.  Each turn that the sentries have seen the enemy, after checking army morale, the WP draws a resolution card and adds the value to a cumulative total.  When the total is at least 15 the rest of the patrol arrives at a random board edge.

Searching the buildings for the objective is just like searching for the holy cross on p33 of OHSW, but succeeds on any face card draw (because it's not small or easy to conceal).

The team probably needs to steal a truck to transport it away.

I'd like to implement a proper solo system for this campaign, to make decisions for the opposition (which I only need because I'm using OHSW on table).

Each enemy figure has a "role" like sentry / patrol, shooter, brawler, officer etc. and a set of waypoint markers to follow.

Then a prioritised list of situations + actions drives how the enemy uses its activations, e.g. Shooter/Artillery with opponent within 6" should move away from the opponent. Conflict of Heroes has this approach, using a deck of cards that with a prioritised list of conditions & actions, drawing a fresh card so that the priorities are not the same every turn.

I could also use the troop classes in Hordes of the Things to suggest some behaviour types: Special Forces (Heroes), Tanks (Knights), APC (Riders), Brawlers (Blades), Shooters & Artillery.  I'll use this game to generate some possible action-rules.

Anyone of a nervous disposition when it comes to unpainted models or scenery should probably skip the rest of this report.  I'm working on some pieces in this area, but the aesthetics of the table top are liable to get worse before they get better.  Mea maxima culpa.

The supply depot

The supply depot is next to a main road (top of the photo).  The guard house is next to the main gate, with various storage sheds to the right and a line of shipping containers to the left.  A few vehicles are scattered around the central paved area.  A back gate at the bottom right of the picture gives access to a footpath. The Brits arrive on the road in the top-right corner.

The WP draw a joker for initiative - end of turn 1.

The Brits get initiative again, but this time they draw a Joker for actions in the phase - end of another turn and nothing has happened yet.

still guarding the front gate

The WP acts at last.  One sentry sets off to patrol the perimeter anti-clockwise, while the other one would like to go overwatch, but that's not available in these rules, so he just waits. Given no other use for actions, the patrolling sentry moves 3 times.

The Brits advance along the perimeter fence, remaining hidden for as long as possible.

By the time the Brits jump out and start shooting up the gate guard, his companion is patrolling on the far side of the compound.

"Eddie" & Fraser step out across the road and open fire.  Both miss.

The gate guard hits Eddie, while his mate starts running back across the compound. The Clock card is 10, so it will probably only need one more card for the rest of the WP force to be called in.

Fraser hits the gate guard.  Mitch runs up to finish him off.

front gate clear

Dangerous & the Major move up.  The patrolling sentry runs across the yard and fires a 2-shot burst at Mitch.  The first one misses, but the second gets him. The Clock advances to 12.

Fraser & Dangerous both miss & the patrol guy misses Dangerous.  The Clock card is a Joker, so the turn ends with the clock stuck on 12.  Both Eddie & Mitch are out of this fight and won't be getting up by themselves.

The patrol sentry moves in closer and shoots at Dangerous - another man down!

Fraser fires back but misses. Major Lawrence rushes in and tackles the guard, taking him out.  The Brits can now spend the rest of the turn searching freely...


The Major checks two trucks (no luck) and has moved on to the 3rd when Fraser calls out a find in one of the shipping containers.  Maj Lawrence gets in the truck & drives it to the container.  Fraser loads the case onto the truck.

Lawrence drives out of the gate, waiting next to the downed Davies.  Fraser gets out to cover him and drags Eddie on board.  Fraser drags Mitch into the lorry (another 4 AP) & also Davies.  With all the casualties on board, Lawrence drives away - their fate can be resolved when we get them back to Bad Spelling.  Dangerous recovers in the back of the lorry.

Scenario design: during Turn 3 the clock was advancing at the end of each phase.  That's excessive with a target of only 15.  However, when I noticed and reverted to my proposed rule (advance the clock at the end of a Turn), the game was over before another turn ended.  The other guards never arrived.

Also, it would make sense to have 2 men carry the device, but how should the Actions work in OHSW?  Should Each man spend 1 action to pick up an end of the case, and then they jointly spend 1 Action to move (like a crewed weapon)?

The Brits had plenty of spare actions available for the Major to jump out of the truck and help Fraser to load the device on board, so it didn't affect the outcome.


General rule system: I allowed Fraser to carry the device and his downed mates with no noticeable movement penalty (although a 3" move would have made no difference), and did not require an Action to pick them up or put them down.  Given the number of actions available to the Brits in Turn 4, this made no difference, but it should probably take an action to pick things up (dropping them is free).

The ability to load Down or Out men onto transport is something I just improvised, but it makes sense if one side is able to leave the field without needing to eliminate all of the other side.

Overall balance was adequate, giving a tense scenario and 3 men down in the final turn.  Lawrence forgot to be inspiring, e.g. to re-draw the downed men going out of action.

There were no obvious moments when I had to think about action-rules to decide what the WP would do, but I guess these applied:

  • Sentry sees enemy: converts to Brawler or Shooter (depending on weapon carried)
  • Shooter with target in range and Line of Sight: shoot
  • Shooter with no enemy in range: close range to nearest enemy
  • Brawler: close range to nearest enemy
  • Sentry: move toward next patrol waypoint

After the fight

  • The Brits have achieved their objective.
  • Edwards is lightly wounded (and will be out for 6 days
  • Mitchell is also lightly wounded and will be out for 10 days
  • The fate of the 2 sentries is not known.
  • No prisoners were taken.
  • Harris is already wounded and out of action until 6/12/83

Reinforcements: Two figures with L1A1 SLR, one with pistol - privates Newton & O'Loughlin arrive, perhaps stragglers from some unit nearer the front.

Specialist gear: temporary replacement weapon - O'Loughlin has a Minimi for the next mission

Skill gain: Fraser gains Scout(1)

Campaign events

  • Paddy O'Loughlin has an accident within minutes of arriving on the base & is out of action for 3 days (until 26/11/83). Maybe Lotte will visit him in sick bay?
  • Intense fighting - we are straight back in action.  No impact on morale (already rolled).
  • The minimi is broken; the burst that hit Green also put a round into the firing mechanism.

Player action: meet a new character (rolled a political figure) - the local mayor, Dieter Pletternberg

Group morale: 3 - rolled 3 good and 2 bad dice, scoring 1 increase

People the team knows:

  • Lotte Meierling, a refugee from Hannover
  • Dieter Pletternberg, mayor of Bad Spelling


Saturday, June 29, 2024

Bad Spelling chapter 2 - rescue the logistics officer

18/11/1983 The Russians focus on advances to the North (into Holland).  5th & 3rd DDR armies occupy Hannover.  Refugees flood West.

Lt Beresford has received orders, and they're not to join the rest of his unit.  He is to gather what force he can and rescue a Major Lawrence who is being held in a section of 3-5 intact buildings near Hannover.  He'll need to take one of the vehicles off the base to reach the area.

This major is some kind of logistics officer with a briefcase, which must also be retrieved.

If the enemy are going to this much trouble, he must know about something more important than tins of corned beef, like the movement of battlefield nukes.

The enemy has 6 East German sentries, 3 guarding the target, 3 patrolling the town, all carrying AK-74s.

Motivation: 2 - these are secondary troops from DDR follow-up units, just holding an area, not here for a fight.

I deploy the sentries first, then the group arrives, vacating the vehicle up to 4" from the table edge. 

Searching the buildings for the Major is just like searching for the holy cross on p33 of OHSW, but succeds on any face card draw.

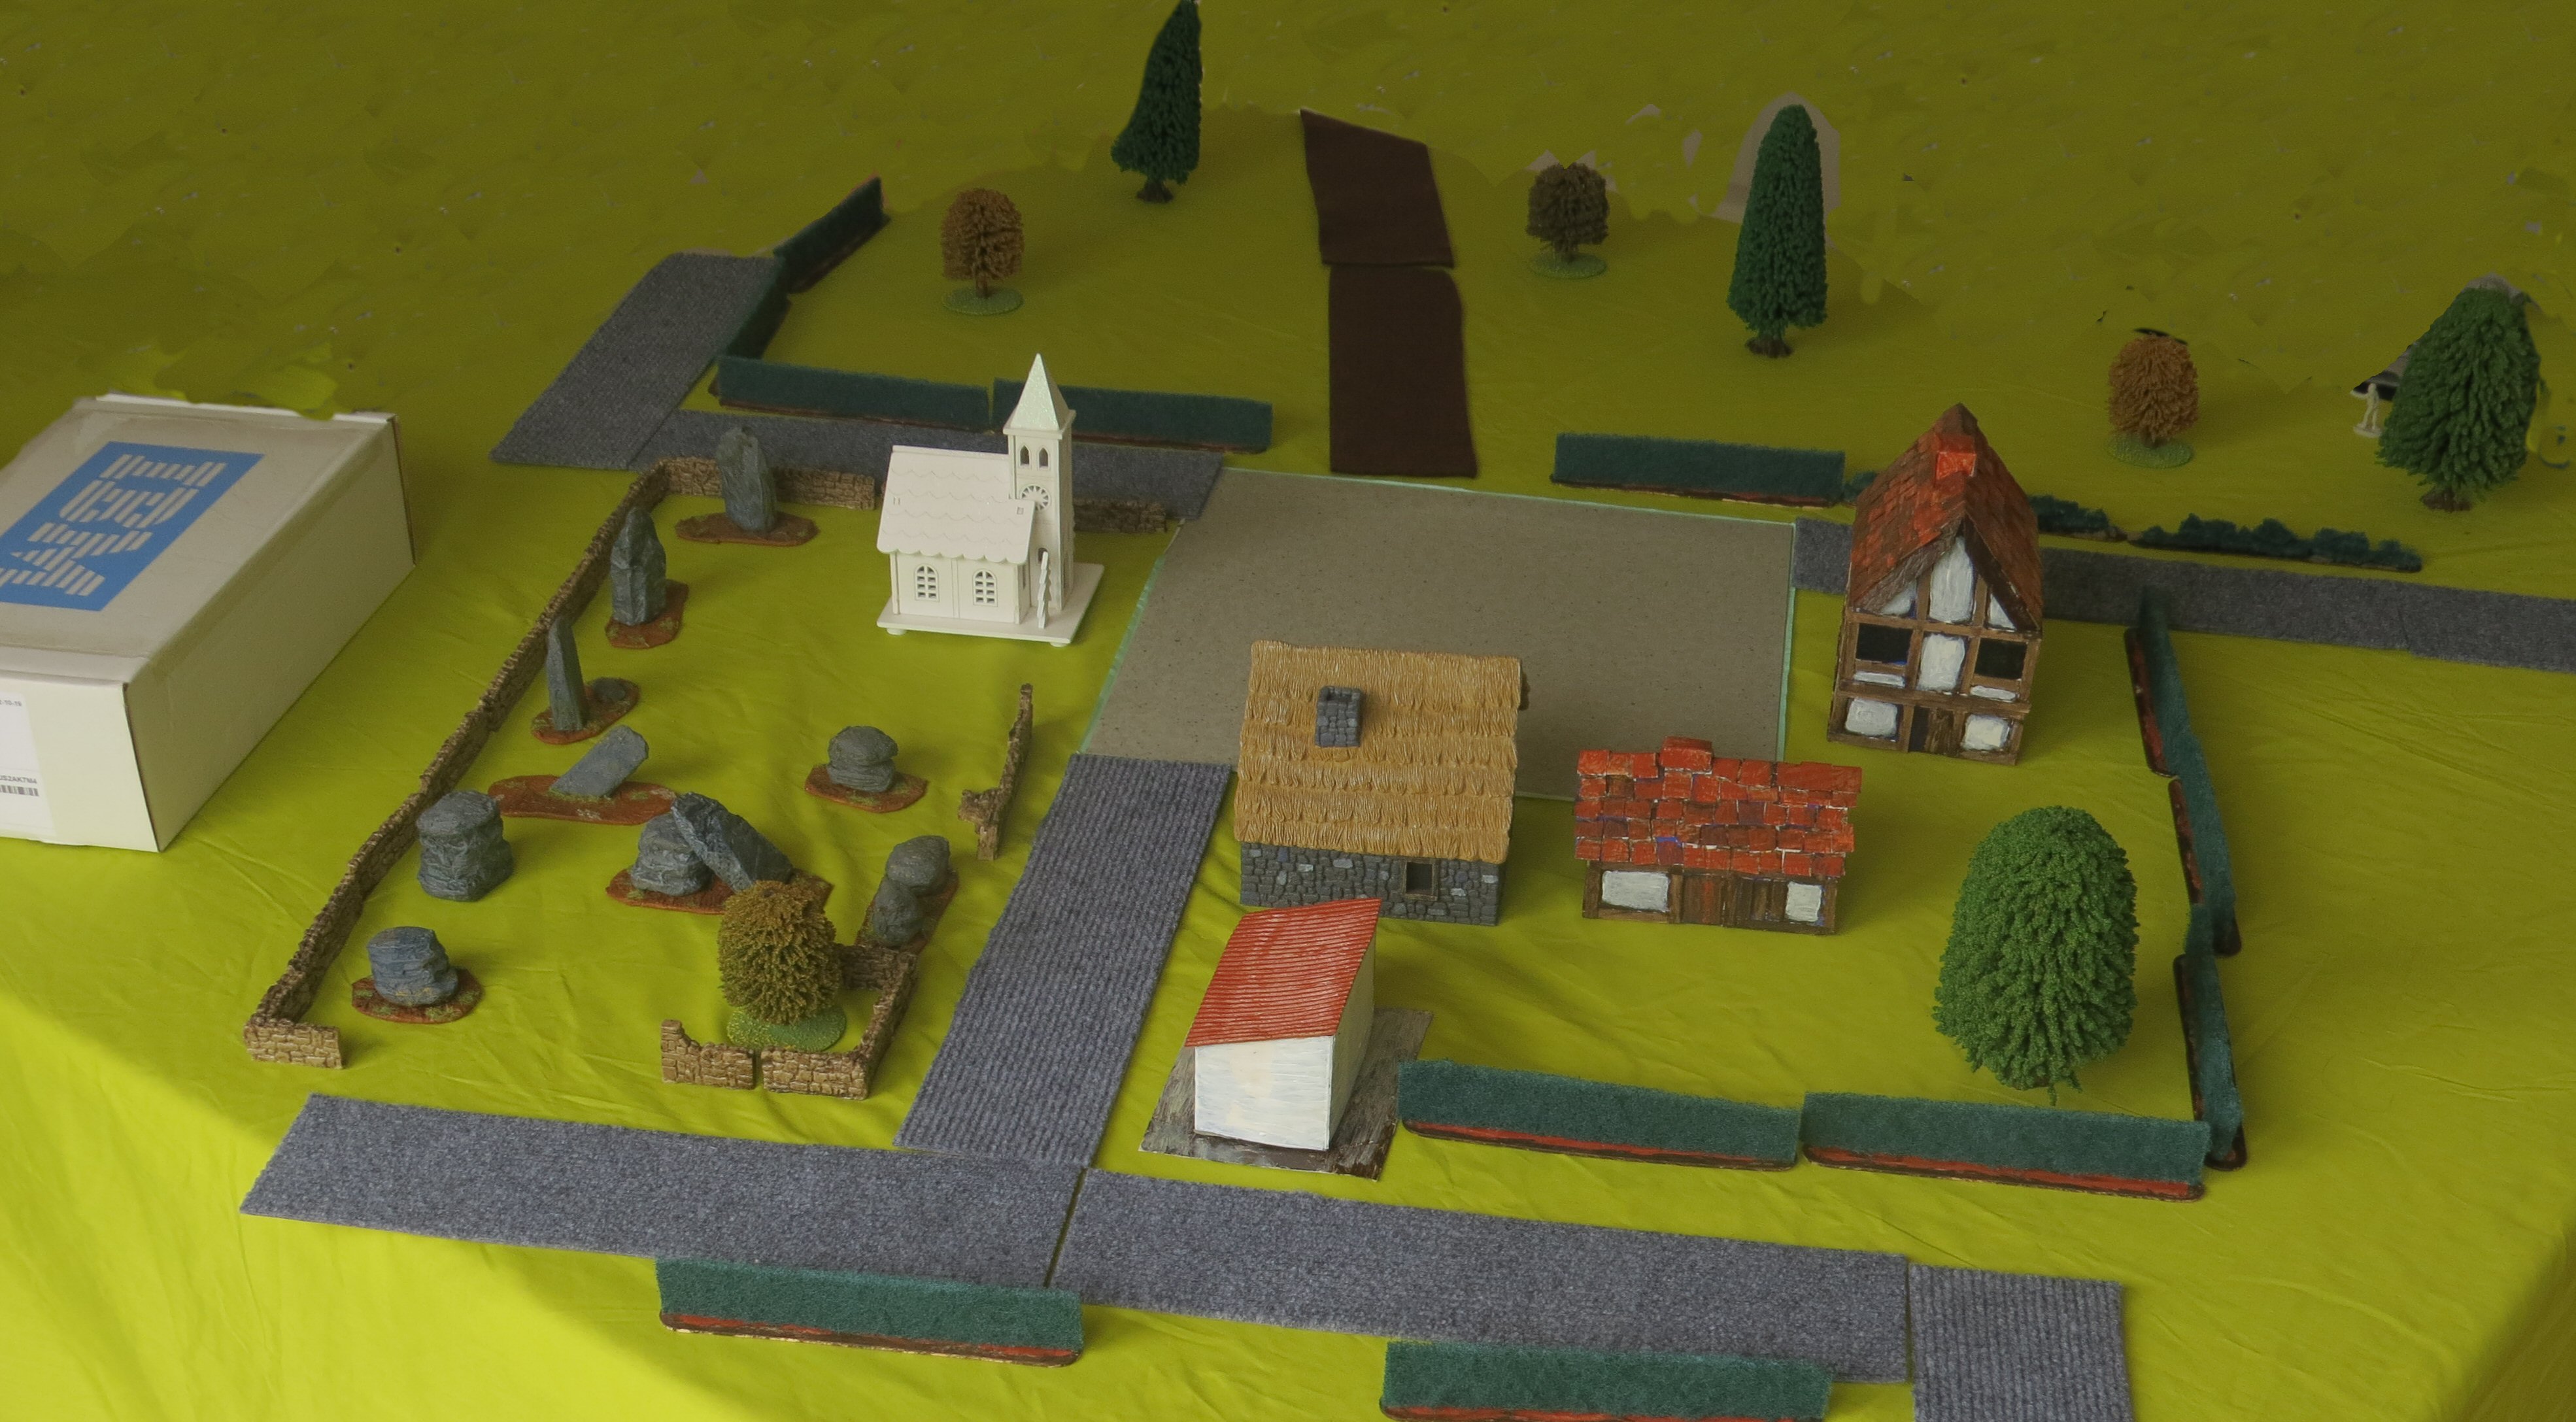
The layout of town

Please excuse what passes for terrain here.  I've not done any Cold War action before, so don't have modern buildings, lamp posts etc..  There may be even worse to come in the next mission until I get hold of some relevant models.

Around the square is a group of historic buildings, including a small church.  The major should be in one of these.  Behind the church looks to be a small IBM office, and one side of the square opens onto some kind of parkland.

The Brits arrive in a corner away from the park and office block


A sentry on duty

The East German sentry at the T-junction spots them, and snaps off a quick shot at Davies, but comes nowhere near hitting him.

Davies & the Ostie trade a couple of shots.  The sound of gunfire attracts two more guards.

Green gets into position to cover the T-junction with the MG and puts down the sentry. One of the guards hits Green in return.  Harris shoots the guard and Davies runs up to finish him off.

Davies remains calm under fire

The last 2 sentries run into action and open fire, missing Davies in plain sight.

Lt Beresford rushes up to finish the other downed sentry, but then goes down himself under fire from the guards.

Davies gets back up, but Green & the Lieutenant stay down.


Harris moves in to start spraying with the SMG and puts one Ostie down. Davies & Harris go down under fire - the Brits are now heavily outnumbered

Harris is taken prisoner.

Davies gets up again, but the Ostie doesn't.  2 Brits now face 3 Germans.

Davies with Edwards just a blur in the foreground face three East Germans


There is a long pause for breath as the two sides eye each other up.  (A whole turn went by with no actions for either side).

Davies remains cool under fire from all 3 Germans, but goes down on the last shot.

Morale check - unbelievable, the defenders break!  (I pulled an Ace with 3 casualties against the DDR)

Davies gets back up again!


As the East Germans fall back, Davies & Edwards check on the rest of the squad and recover Major Lawrence from one of the buildings around the central square.

Assessment: top action yet again, and the Brits were phenomenally lucky not to all end up as prisoners.

After the fight:

  • The Brits have achieved their objective.
  • Of the 6 East Germans, the last one Edwards shot will be fine later, with a dramatic scar, and was carried away by his comrades. 2 were definitely killed by Davies & Beresford.
  • No prisoners were taken by the Brits.
  • Green is permanently injured and will be invalided home.
  • Lt Beresford is mentally scarred by the memory of finishing off the sentry at the T-junction.
  • Harris is seriously wounded and out of action for 18 days (back on 6/12/83)

I rolled for reinforcements and received one man with a pistol - that will be Major Lawrence joining the group.

2 more grenades have been found and will be carried somewhere among the group.

Major Lawrence turns out to be Inspiring.

Campaign events

  • Lt Beresford is reassigned & gets his orders for some "proper" duty.
  • The minimi is broken; the burst that hit Green also put one round into the firing mechanism.
  • Maj Lawrence decides to add another member to the team and finds Pvt Mitchell.

Group morale: still 2 - rolled 3 good and 4 bad dice, with 1 hit on each side.

People:

  • Lotte Meierling, a refugee from Hannover


Until next time, health & happiness to you all.


Tuesday, June 25, 2024

Bad Spelling chapter 1 - the training grounds

14/11/1983 - The Russians have invaded, 20 Armoured Brigade has moved off.  Our group of signals and base guards should be somewhere else but hasn't yet been ordered to go.

They are on a perimeter patrol when they bump into a short-handed squad of Soviets (I rolled up a military mission, in a section of prepared positions in walking distance of the base, because no transport is needed).

The enemy as rolled up has six AK-74s and one pistol.  At a guess, the RPG and PK are back at the APC and the lieutenant is taking half the squad to investigate.

Motivation: 3 (chosen on the basis of campaign history) these are recce units, scouting the flanks not here for a fight, from an elite force (3rd Shock army) in the middle of a successful offensive


The terrain setup has the Soviets arrive through the woods beyond the training ground, the British patrol just inside the fence, with two prepared trenches in easy reach.  This could turn into a long-range shooting match.

The trenches and the woods

At this stage I don't have a programmed opponent, I'm just playing both sides and doing whatever seems most useful with the turn.

The Brits get first move and rush for the prepared positions. 


For OHSW terrain effects: 

  • The trenches count as cover +2 cards and can be defended for 3" around a man (like the redoubt in the Zulu scenario).
  • The woods are cover +1 card, and block Line of Sight unless the firer or target is within 1" of the edge of the wooded area.
  • The site fences take 1 move to cross.
  • The bushes block LoS, take 1 move to cross, but are not cover.


The first three Russians make it to the edge of the trees. Fraser & Adams open fire and two of them go down.

Three Russians target Adams but all miss.  At the end of the turn, one of the Russians gets back up, but the other is a casualty.


On turn two the Russians get the initiative and all fire. Adams goes down, but the turn ends quickly and he gets up again

Next turn the Brits take initiative, Adams puts one man down, but then the turn ends & he gets back up again unhurt.


Turn four, the Russians blaze away and Adams goes down and stays down.

Then follows lots of ineffective shooting in both directions.

Green puts down a Russian, Fraser & Edwards go down, but they all get back up.


Turn 7 doesn't happen (I turned a Joker for initiative) - this should trigger a special event of some kind (e.g. 5MIN p55/56), but I was caught out and didn't roll one.


The next turn Fraser & Edwards are hit; Edwards recovers, Fraser stays down.  This is looking a bit grim for the Brits.

There follows another turn of ineffective shooting.


Turn 10 the Brits have the initiative and plenty of actions.  Harris charges forward all the way to the site fence.  Davies & Huey provide covering fire, putting 2 Russians down.

Harris crosses the fence.  He moves up through the trees and finishes off one Russian.

Davies puts down another Russian.

Harris despatches 2 more Russians and opens up on the officer with his SMG. Turn over!

Harris rushing the Soviets in the woods

Davies & Green fire and the two remaining Russian riflemen go down.  The Russian officer shoots Harris, who goes down!  Edwards starts to cross the field and advance on the Russian position.

The Russian officer has to decide whether to step forward and take Harris prisoner, but expose himself to being shot at by the rest of the Brits...  He bottles out and moves to the rest of his men.

Edwards crosses the fence and is right in danger.  The Russian officer steps forward to shoot at Edwards - and misses!

Edwards finishes off a downed Russian.  The officer and Edwards shoot at each other and miss.

Davies hits the Russian officer.  Edwards runs up and captures him. Turn over!

Russian morale breaks!


It is not clear whether I should carry on and test for casualties for the two downed figures.  I do it anyway, even though I don't want Harris to become a casualty after his bold move.

Harris is fine, and so is the Russian.  Ivan surrenders (he could have run to the APC at the risk of being shot in the back, but he's not that committed).

Assessment: top action, very exciting, and only one rule broken by mistake (Harris entered melee twice in a phase).

If the Russian officer had stepped forward to grab Harris, he would probably have gone down anyway.

There were too few men for the OHSW squad break condition to arrive - a 7-man squad could take half losses (4) and still carry on 85% of turns, given this leadership.  To increase the number of men on a side, I will allow reinforcments if down below 8 men and give the enemy 5 rolls on the force table instead of 3. Each roll is effectively 1.33 men, so this should balance the two sides.

After the fight:

The Brits have achieved their objective, completely defeating the Russian squad.

Of the 7 Russians, the officer & 1 other surrendered, 4 were definitely killed by Harris & Edwards.  The remaining one is seriously wounded, but will live. 3 prisoners in all.

Fraser has a light wound is out of action for 4 days (back on 19/11/83)

Adams is seriously wounded and will be reassigned.  He's not coming back to Bad Spelling.

No reinforcements are available, because we still have 5 men in the group.  In future, I will change this to be 8, becausee OHSW really expects more than 7 men one a side.

Campaign events: Sgt Knight has died in action elsewhere around the town.

Cpt Johns has had his movement orders and is packing to leave as the patrol gets back to barracks.  He'll take the prisoners with him.  Beresford recommends Harris for another medal, if Johns will write it up.

Player action: assign Green to take a Minimi for the squad - succeeds.

Group morale: still 2 - I rolled 6 good and 2 bad dice, but was unlucky

People:

  • Lotte Meierling, a refugee from Hannover


Until next time, health & happiness to you all.

Two crimes in one

 A grim tale for Christmas. My daughter wanted an Amazon gift card for Christmas, so we bought her one at a supermarket. Just before this, s...